There’s something most homeowners never think about until their water heater starts acting up: the stuff that accumulates inside your tank. Over time, sediment builds up on the bottom—a crusty layer of minerals, rust, and debris that reduces efficiency, creates noise, and can actually shorten your water heater’s lifespan by years.
The good news? Flushing your water heater is one of the cheapest, easiest maintenance tasks you can do. A professional flush costs $100–$200 and takes about an hour. If you’re comfortable doing basic plumbing work, you can do it yourself for under $50 in materials. Either way, this one task can add 2–3 years to your water heater’s life and improve performance immediately.
Here’s the complete guide to flushing and draining your water heater the right way.
Why You Should Flush Your Water Heater
Before we get into the how, let’s talk about why this matters. Your water heater doesn’t just heat water—it collects everything that’s in your water supply. Minerals from hard water, rust particles from old pipes, and sediment accumulate on the bottom of the tank over months and years.
When that sediment builds up, several things happen. First, your water heater works harder to heat the same amount of water, using more energy and costing you more money. Second, sediment creates noise—that rumbling, popping sound you might hear is actually sediment particles bouncing around as they’re heated. Third, sediment acts as an insulator, trapping heat at the bottom of the tank instead of distributing it throughout. Finally, that buildup puts extra stress on the tank itself, leading to corrosion and premature failure.
The American Water Works Association recommends flushing your water heater at least once a year. In New Jersey, where water hardness is moderate to high in many areas, annual flushing is especially important. Hard water means more mineral accumulation, which means faster sediment buildup. If you live in North Jersey near the Hudson River valley or have noticed mineral deposits on your faucets, you’re dealing with harder water and should flush twice a year.
A water heater that gets flushed regularly lasts 12–15 years. One that never gets flushed might fail at 8–10 years. That’s thousands of dollars difference over the life of the appliance.
Tools and Materials You’ll Need
Before you start, gather everything you need. This prevents stopping halfway through to run to the hardware store, which is the fastest way to turn a simple maintenance task into a disaster.
You’ll need a hose that’s long enough to run from the drain valve at the bottom of your water heater to a floor drain or outside. Most people use a standard garden hose, which works fine. The key is that the hose must fit the drain valve connection—most water heaters use a standard ¾-inch garden hose fitting. If yours is different, you’ll need an adapter from the hardware store ($5–10).
You’ll also need a bucket for catching water that comes out before you connect the hose, and old towels or a floor mat to protect your floor from water spills. This gets messy, and you don’t want water damage in your basement or utility room.
Grab a pair of work gloves—the water coming out of the drain valve will be hot initially, and you don’t want to burn yourself. A wrench or adjustable wrench is helpful if the drain valve is stuck or corroded. A flathead screwdriver comes in handy if you need to open a valve or adjust anything.
Finally, keep a shop vacuum nearby. Sometimes water spills happen despite your best efforts, and a shop vac cleans up much faster than towels.
Optional but helpful: a hose vacuum breaker or check valve prevents water from backing up into your home’s supply line—something that’s not a problem in most cases, but some jurisdictions require it. Check your local codes to be sure.
Step 1: Turn Off the Water Heater Power (Electric Units Only)
If you have an electric water heater, go to your electrical panel and flip the breaker that controls the water heater to the off position. If you have a gas unit, you do not need to turn off the gas—simply proceed to Step 2.
Wait about 10 minutes before proceeding. This allows the water inside to cool slightly. Hot water at 120+ degrees Fahrenheit will burn you badly, and you’re about to open a drain valve. Give it time to cool to a manageable temperature.
Don’t skip this step or rush it. Every year, people burn themselves on hot water coming from the drain valve.
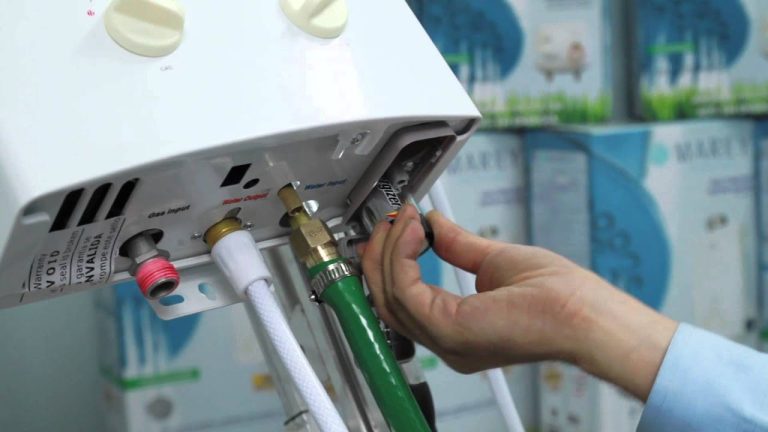
Step 2: Locate the Drain Valve and Connect Your Hose
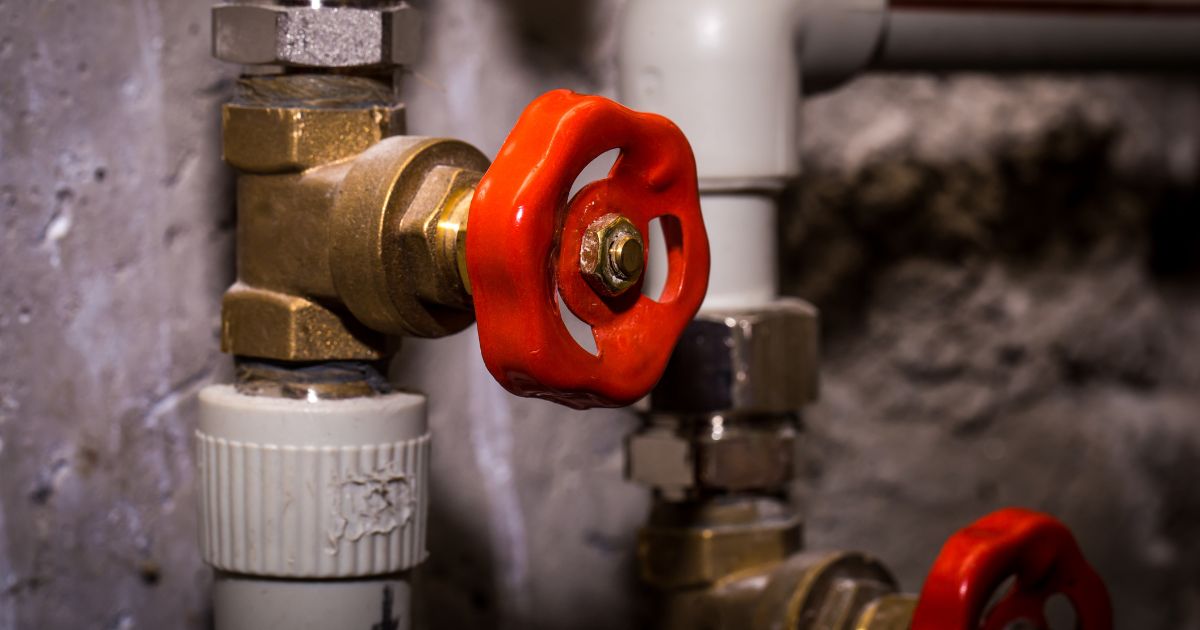
The drain valve is at the bottom of your water heater tank. It looks like a standard outdoor faucet—a small brass or plastic valve with a spigot. This is where the water will come out, so position your hose before you open it.
Important: Keep your water supply ON. You will not turn off the main water valve. This is the opposite of traditional water heater work—we’re keeping fresh water flowing into the tank while you drain only 5–10 gallons from the bottom.
Attach your garden hose to the drain valve spigot. Make sure it’s tight—you don’t want water spraying out the connection. Run the hose to a suitable drainage area. Ideally, this is a floor drain, a basement drain, or outside. If you’re running it outside, make sure the hose doesn’t block walkways or create a tripping hazard.
Position a bucket under the drain valve as well. You’ll catch the initial flow while you get the hose positioned properly.
Step 3: Open a Hot Water Faucet Upstairs
This step is crucial and often overlooked. Before you open the drain valve, go to a hot water faucet upstairs or in another part of your home and turn it on. Leave it running.
Why? As sediment-filled water drains from the tank, you need to allow fresh water and circulation to help push out the sediment. The open faucet helps with water circulation through the system. This is a simple trick that makes the whole process much faster.
Step 4: Open the Drain Valve Slowly
Now for the actual draining. Go back to the drain valve at the bottom of your water heater and slowly open it. Turn the handle counterclockwise, starting gently. You’re not trying to blast water out—you’re opening it gradually so you can monitor what comes out and make sure your hose is positioned correctly.
When you first open the valve, sediment-filled water will start flowing. It often looks brown, murky, or cloudy—that’s the sediment you’re removing. This is exactly what you want to see. The cloudier and dirtier the water, the more sediment was in your tank.
Let the water run into your bucket or hose for about 30 seconds, then check the hose to make sure water is flowing properly. If it’s just dribbling, wait another minute. Sometimes a valve is a bit stuck from sitting unopened for years.
Step 5: Drain Only 5–10 Gallons
This is critical and different from a complete tank drain. You want to drain only 5–10 gallons of water from the bottom of the tank. This removes the sediment-heavy water from the lowest part of the tank without completely emptying it.
Let the water flow for approximately 2–3 minutes. The water will start out very cloudy and brown (heavy sediment), then gradually become clearer. After 2–3 minutes, the bulk of the sediment has been removed. Stop here—do not drain the entire tank.
This method is superior because it maintains water pressure in your system, allows fresh water to continuously enter the tank and help flush out sediment, and takes far less time than a complete drain.
While the water drains, check periodically to make sure the hose hasn’t come loose and water isn’t backing up somewhere. Every minute or so, glance over to make sure everything is flowing smoothly.
Step 6: Close the Drain Valve
Once you’ve drained approximately 5–10 gallons and the water looks relatively cleaner (not crystal clear, but noticeably clearer than it started), close the drain valve by turning the handle clockwise. Turn it firmly but don’t over-tighten. You want it snug enough that it doesn’t leak, but forceful tightening can damage the valve.
Disconnect the hose from the drain valve.
Step 7: Allow the System to Circulate
With the water supply still on (as it has been the entire time), the fresh water that’s entering the tank will help push out remaining sediment. Go back to that hot water faucet upstairs that you left running. Let it run for another 2–3 minutes. This circulates fresh water through the system and completes the flushing process.
You should notice the water becoming clearer as this fresh circulation happens. The combination of the initial 5–10 gallon drain plus this circulation period accomplishes what a full tank drain would do, but with much less hassle and faster execution.
After 2–3 minutes, turn off the hot water faucet.
Step 8: Turn the Power Back On (Electric Units Only)
If you turned off the breaker on an electric water heater in Step 1, now go back to your electrical panel and flip the breaker back on. If you have a gas unit, there’s nothing to do here.
Wait about 30–45 minutes before using hot water. The heating element needs time to reheat the fresh water in the tank. Some water heaters have a reset button that you might need to press if the system didn’t restart automatically. Check your unit’s manual if the water doesn’t heat up within an hour.
How Often Should You Flush Your Water Heater?
The standard recommendation is once per year, ideally in spring before summer demand increases. If you have hard water (which is common throughout New Jersey), consider flushing twice a year—once in spring and once in fall.
Several signs indicate your water heater needs flushing sooner:
- If you’re hearing rumbling, popping, or banging sounds from your water heater, sediment buildup is likely causing it. Flushing often eliminates these noises immediately.
- If your hot water doesn’t seem as hot as it used to be, or if you’re running out of hot water faster than you used to, that’s often sediment reducing efficiency.
- If you notice rust-colored or cloudy water from your hot water taps, that’s sediment being stirred up as the tank deteriorates.
- If you haven’t flushed your water heater in several years, do it before something breaks.
New Jersey Winter: Why Flushing Matters Before Cold Weather
For New Jersey homeowners specifically, there’s an extra reason to flush your water heater in the fall: winter preparation. As cold weather hits, your water heater works harder. Cold incoming water from the ground is much colder in winter than in summer, so your heater uses more energy to bring it to temperature.
A sediment-clogged water heater struggles even more in winter. The combination of harder work plus reduced efficiency can cause the heater to fail right when you need it most—when outside temperatures are freezing and you’re dealing with the holidays.
Additionally, in winter, if your water heater is older or marginally functional, cold stress can be what finally breaks it. A fall flush ensures your heater is in peak condition before the heating season. It costs $100–200 for a professional flush (or $30 in supplies if you DIY it) versus $1,200–3,500 for an emergency replacement when your heater fails on a freezing night in January.
This is especially true in northern New Jersey areas where winter is harsh and long. Maintenance in the fall pays for itself many times over by preventing winter emergencies.
When to Call a Professional Instead
For most homeowners, flushing your water heater is absolutely doable. But there are situations where calling a professional makes sense.
If your water heater is more than 12 years old and has never been flushed, there might be heavy sediment buildup that requires more aggressive flushing. A professional has specialized equipment like a water heater cleaning system that uses pressure to dislodge stubborn sediment. This costs more (usually $150–250) but is worth it if your tank is in rough shape.
If the drain valve is stuck or corroded and won’t open, don’t force it. You could damage the valve or the tank. Call a professional. They have techniques and tools to open stuck valves without damaging them.
If you see significant leaks during or after the flushing process, stop and call a professional. Leaking tanks or valves need professional attention.
If you’re not comfortable with the process or don’t have the tools, there’s no shame in hiring it out. A one-hour professional flush is straightforward and affordable.
If you have a tankless water heater, flushing is different and more complex. Call a professional for tankless units. Regular tank water heaters are DIY-friendly with this method; tankless systems are not.
Related Maintenance You Should Know About
Flushing is the most important maintenance task, but there are a few other things worth doing annually.
The anode rod is a sacrificial metal rod inside your tank designed to corrode instead of the tank itself. Over time, it gets used up and needs replacing. A professional inspection costs $50–100, and replacement costs $150–300. If your tank is more than 5–7 years old and has never had the anode rod inspected, that’s a worthwhile maintenance task.
The pressure relief valve should be tested annually to make sure it operates correctly. This is a simple test—you pull a small lever to let out a bit of water and pressure, then release it. If it doesn’t seal properly afterward, it needs replacement. A pro can test this during a flush visit.
Insulating your tank with a water heater blanket saves energy and costs about $20–30 for the materials. It’s not necessary if you have a newer, well-insulated tank, but it helps older tanks.
The Bottom Line: Maintain Your Investment
Your water heater is a major appliance that most homeowners take for granted until something goes wrong. A little bit of maintenance prevents big problems and extends the life of the unit by years.
Flushing your water heater once a year takes less than an hour (or less if you hire a professional), costs nearly nothing if you DIY it or $100–200 if you have someone do it, and can add 2–3 years to your heater’s lifespan. That’s an incredible return on investment.
For New Jersey homeowners, scheduling your flush for fall—before winter hits—gives you the added benefit of ensuring your heater is ready for the cold months when failure would be most inconvenient and most expensive.
If you’ve never flushed your water heater before, or if it’s been more than a year since the last flush, now is the time. Follow this guide, take your time, and don’t hesitate to call a professional if you run into issues. Either way, your water heater will thank you with years of reliable service.
Professional Water Heater Maintenance in New Jersey
If you’d rather have professionals handle your water heater maintenance, Doctor Water Heater provides comprehensive flushing and inspection services throughout New Jersey. We can flush your tank, inspect the anode rod, test the pressure relief valve, and make sure everything is ready for winter—all in one visit.
Whether you DIY your flush or have us handle it, the important thing is that you’re maintaining this critical appliance. Don’t wait until something breaks to think about your water heater.
Schedule Your Water Heater Maintenance Today
Related Water Heater Articles
Before you schedule a flush, make sure your water heater is actually worth maintaining or if replacement might be a better option.
- Water Heater Replacement Cost in 2026 — What to budget if replacement becomes necessary
- Water Heater Parts You Can Replace — When DIY parts replacement makes sense
- When Should You Replace a Water Heater? — Is your heater nearing the end of its life?
- Why Water Heaters Fail More in Winter (NJ Edition) — Understanding winter stress on your system
Flushing frequency depends on your water hardness and usage. Check your manufacturer’s recommendations for your specific unit. If you’re uncomfortable with any step in this process, consult a licensed plumber.