Quick Answer: Installation Time by Type
How long does it take to replace a water heater? The answer depends on your system type. Here’s what you need to know:
| Water Heater Type | Installation Time |
|---|---|
| Gas Tank Water Heater | 2–4 hours |
| Electric Tank Water Heater | 2–3 hours |
| Gas Tankless | 6–8 hours |
| Electric Tankless | 6–8 hours |
| Gas Tankless Combi | 6–8 hours (sometimes 2 days) |
| Power Vent Water Heater | 2–4 hours |
| Indirect Water Heaters | 6–8 hours |
💡 Most Common Scenario: A standard gas tank water heater replacement takes 2–3 hours and is the most affordable option for most homeowners.
The Complete Installation Timeline Explained
Planning your water heater replacement? Understanding what happens during installation day helps you prepare, take time off work, and know what to expect. Let’s break down every step of the process.
Standard Gas Tank Water Heater Installation (2–4 Hours)
This is the most common replacement, affecting about 60% of American homeowners. Here’s exactly what happens:
Pre-Installation Checklist (Before the Plumber Arrives)
Before your technician shows up, they should:
- Confirm appointment 24 hours in advance
- Review your current system from photos
- Gather the right equipment and parts
- Verify permit status with your municipality
- Estimate parking needs and access points
Typical Installation Timeline for Gas Tank
Hour 1: Inspection & Preparation (0–60 minutes)
- Plumber arrives and assesses your current water heater location
- Inspects existing gas lines, venting, and water connections
- Identifies any complications (access issues, code upgrades needed)
- Reviews permit and inspection requirements with you
- Turns off gas and water to existing system
- Establishes work area and lays protective materials
What You’ll Notice: Some water pressure loss if plumber works during normal usage hours. Have bottled water available.
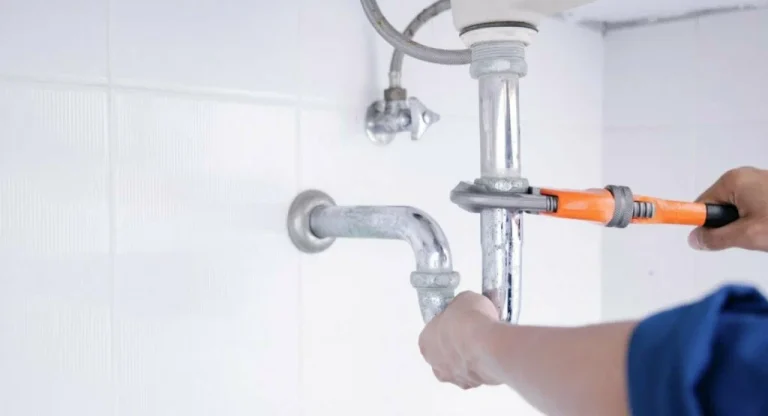
Hour 2: Removal of Old Unit (60–120 minutes)
- Drains water from old tank (can take 20–30 minutes with sediment)
- Disconnects gas line from old unit
- Disconnects water supply and return lines
- Removes temperature and pressure relief valve
- Carefully removes old tank (typically 80–150 lbs)
- Cleans mounting area and prepares for new installation
What You’ll Notice: Water noise, some odors as tank drains, temporary loss of hot water. This is normal.
Hour 3: Installation of New Unit (120–180 minutes)
- Positions new tank on mounting pad or stand
- Reconnects water supply lines
- Installs new or reuses existing relief valve
- Connects gas line with proper fittings
- Tests all gas connections for leaks
- Fills new tank with water to purge air
- Lights pilot light and tests ignition
- Adjusts temperature settings (usually 120°F)
- Performs pressure testing if required
What You’ll Notice: Sounds of water filling tank, gas ignition sounds, plumber testing hot water.
Hour 4: Final Testing & Cleanup (180–240 minutes)
- Tests hot water at multiple fixtures
- Verifies temperature and pressure relief valve operation
- Checks for leaks or drips
- Removes protective materials and cleans work area
- Provides you with documentation and warranty information
- Explains operation and maintenance needs
- Schedules inspection if permit required
Typical Outcome: Hot water restored in 30–45 minutes after ignition.
Electric Tank Water Heater Installation (2–3 Hours)
How long to replace a water heater when it’s electric? Usually faster than gas, since there’s no venting or gas line work involved.
Why Electric Is Typically Quicker
- No gas line work (saves 30–45 minutes)
- No venting modifications needed
- Simpler connections to existing wiring
- Faster testing protocols
Typical Timeline Breakdown
| Phase | Time |
|---|---|
| Inspection & prep | 20–30 min |
| Removal of old unit | 40–60 min |
| Installation of new unit | 45–75 min |
| Testing & cleanup | 15–20 min |
| Total | 2–3 hours |
Key Differences from Gas
- Plumber may verify electrical capacity at breaker panel
- May test amperage draw
- No gas line pressure testing
- Temperature settings verified electronically
⚠️ Important: If your home needs electrical panel upgrades, add 2–4 hours for that work, requiring a licensed electrician in addition to the plumber.
Tankless Water Heater Installation (6–12 Hours)
How long does it take to replace a water heater with tankless? Significantly longer. Tankless systems are more complex, which is why they’re costlier and take longer to install.
Gas Tankless Installation (6–8 Hours, Sometimes 2 Days)
Gas tankless requires more sophisticated work:
Day 1 (4–6 hours)
- Remove old tank water heater
- Assess venting system requirements
- Determine gas line adequacy
- Evaluate water hardness and flow rate
- Install tankless unit mounting
- Connect water supply/return lines
- Begin gas line connections
Day 2 (2–3 hours) — Often Next Day
- Complete gas line installation
- Perform pressure testing on gas lines
- Install and secure venting system
- Complete electrical connections
- Fill system and perform full testing
- Test multiple hot water fixtures simultaneously
- Verify temperature consistency
- Final cleanup and inspection preparation
Why It Takes Longer
- Venting system modification ($300–$800 labor)
- Gas line pressure testing (required by code)
- Flow rate calibration
- Water hardness testing
- Temperature consistency verification
- Electronic control system configuration
Common Complications That Extend Time
- Venting routing: +1–2 hours
- Gas line upgrades: +1–2 hours
- Electrical panel work: +2–4 hours
- Water softener integration: +1–2 hours
Electric Tankless Installation (8–12 Hours, Usually 2 Days)
Electric tankless is even more time-consuming:
Day 1 (4–6 hours)
- Remove old water heater
- Assess electrical panel capacity
- Determine if panel upgrade needed
- Install tankless unit
- Begin water line connections
- Assess venting (minimal for electric)
Day 2 (4–6 hours)
- If needed: Electrician upgrades electrical panel (main task)
- Run new electrical wiring to unit location
- Install new circuit breaker(s)
- Connect unit to electrical supply
- Test unit operation
- Verify water temperature
- Final cleanup
Why It Takes Longest
- Most require electrical panel upgrades ($1,000–$3,000)
- Electrician must coordinate with plumber
- New circuit breaker installation
- Extensive wiring runs
- Safety testing protocols
Typical Scenario: If your home needs a panel upgrade (most electric tankless), expect 2 separate visits totaling 8–12 hours of labor.
Factors That Affect Installation Time
Factors That Speed Up Installation ✅
Ideal scenarios (shorter times):
- Replacing with same type (gas with gas, electric with electric)
- Unit in accessible location
- Existing connections in good condition
- No permits required
- No code upgrades needed
- No complications during removal
These conditions can shave 30 minutes to 1 hour off typical installation.
Factors That Slow Down Installation ⏱️
Common complications (add 1–3 hours):
1. Difficult Removal of Old Unit
- Corroded bolts requiring heat gun
- Tank stuck to mounting surface
- Old sediment creating extra weight
- Difficult access to shutoff valves
- Additional time: +30–90 minutes
2. Venting System Modifications
- Old venting incompatible with new unit
- Structural obstacles requiring rerouting
- Sealing and insulation requirements
- Additional time: +1–2 hours
3. Gas Line Issues
- Old lines need pressure testing
- Improper sizing requiring upgrade
- Multiple connection points needing work
- Additional time: +45–90 minutes
4. Code Compliance Upgrades
- FEMA earthquake straps installation
- New shutoff valve required
- Expansion tank installation
- Venting hood modifications
- Additional time: +30–60 minutes
5. Electrical Work
- Panel upgrades for electric systems
- New circuit installation
- Wiring runs longer than standard
- Additional time: +2–4 hours
6. Water Line Complications
- Original connections too corroded
- New path required for lines
- Solder work on copper connections
- Pressure testing requirements
- Additional time: +30–75 minutes
7. Limited Access or Tight Spaces
- Attic installations
- Crawl space locations
- Basement corner placements
- Multiple tight turns accessing unit
- Additional time: +30–120 minutes
Real-World Installation Scenarios
Scenario 1: Straightforward Gas Tank Replacement
Situation: 40-gallon gas water heater in basement, good access, no complications, same size unit
| Task | Time |
|---|---|
| Inspection & shutdown | 20 min |
| Drain & remove old unit | 50 min |
| Install new unit | 70 min |
| Test & cleanup | 20 min |
| Total | 2 hours 40 minutes |
Cost Reference: $1,300–$1,700
Scenario 2: Gas Tank with Minor Complications
Situation: Replacing old corroded unit, some gas line work needed, code permits required
| Task | Time |
|---|---|
| Inspection & shutdown | 25 min |
| Remove corroded unit (difficult) | 90 min |
| Gas line pressure testing | 30 min |
| Install new unit | 75 min |
| Code upgrade work | 45 min |
| Test & cleanup | 25 min |
| Total | 4 hours 30 minutes |
Cost Reference: $1,800–$2,300
Scenario 3: Electric Tank Water Heater (No Panel Upgrade)
Situation: Replacing electric tank in utility room, adequate electrical capacity, good access
| Task | Time |
|---|---|
| Inspection & shutdown | 15 min |
| Drain & remove old unit | 40 min |
| Install new unit | 60 min |
| Electrical connections | 20 min |
| Test & cleanup | 15 min |
| Total | 2 hours 30 minutes |
Cost Reference: $1,000–$1,400
Scenario 4: Electric Tankless with Panel Upgrade
Situation: Converting from tank to tankless, electrical panel upgrade required
Day 1 (Plumber — 4 hours)
| Task | Time |
|---|---|
| Inspect & remove old heater | 60 min |
| Assess electrical needs | 30 min |
| Mount tankless unit | 45 min |
| Water line installation | 75 min |
| Prep for electrician | 30 min |
| Day 1 Total | 4 hours |
Day 2 (Electrician — 3 hours)
| Task | Time |
|---|---|
| Electrical panel upgrade | 120 min |
| Run wiring to unit location | 60 min |
| Day 2 Total | 3 hours |
Day 2 (Plumber Returns — 1.5 hours)
| Task | Time |
|---|---|
| Final connections | 30 min |
| System testing | 45 min |
| Return Visit | 1.5 hours |
Total: 8.5 hours across 2–3 days | Cost Reference: $3,500–$5,000+
Scenario 5: Gas Tankless Installation
Situation: Converting from gas tank to gas tankless, venting system overhaul needed
Day 1 (Plumber — 5 hours)
| Task | Time |
|---|---|
| Inspect & remove old heater | 60 min |
| Assess venting requirements | 30 min |
| Mount tankless unit | 60 min |
| Water line installation | 90 min |
| Begin gas connections | 45 min |
| Day 1 Total | 5 hours |
Day 2 (Plumber — 3 hours)
| Task | Time |
|---|---|
| Complete gas line work | 60 min |
| Install & secure venting | 90 min |
| Pressure testing | 30 min |
| System testing & calibration | 40 min |
| Day 2 Total | 3 hours |
Total: 8 hours across 2 days | Cost Reference: $3,850–$6,495 in New Jersey
Timeline: What Happens Before Installation Day
Don’t wait until installation day to prepare. Here’s what happens before the plumber arrives:
1–2 Weeks Before Installation
- Apply for permit if required (clarify with local municipality)
- Verify permit approval
- Get inspection scheduled (if needed)
- Confirm appointment with plumber
- Discuss any complications
2–3 Days Before Installation
- Confirm appointment time
- Note any questions about your system
- Take photos of current water heater location
- Clear access area around water heater
- Ensure contractor can access parking
- Plan for potential hot water unavailability
Day Before Installation
- Clear any items blocking water heater access
- Move vehicles to allow contractor parking
- Have contact information ready
- Take a photo of your water heater model/serial number (for warranty)
- Know where main water shutoff is located
Installation Day: What to Expect Hour by Hour
Morning Preparation (You Do This)
Before 8 AM:
- Clear work area (3-foot radius around heater)
- Move any valuables away from work zone
- Keep pets away from work area (noise can frighten animals)
- Have coffee or water ready for technician
- Have cell phone charged for questions
- Keep documentation/warranty info nearby
Technician Arrival (Hour 0)
Expected time: Arrive within scheduled window
What happens:
- Plumber reviews job with you
- Confirms water heater type and location
- Discusses any issues noticed since quote
- Explains work process
- Sets up work area
- Gathers equipment from truck
Your job: Answer questions, sign work authorization if needed
Active Installation (Hours 1–3)
What you’ll experience:
- Water pressure drops significantly
- Old water heater drains (can smell)
- Metallic/industrial sounds (tools, moving equipment)
- Temporary gas odors (normal, not dangerous)
- Hot water stops (20–45 minutes until new system heats up)
- Conversations with plumber about the work
During this time:
- ✅ Stay available for questions
- ✅ Don’t use plumbing fixtures (preserves water in system)
- ❌ Don’t turn on main water valve
- ❌ Don’t interfere with work area
Testing Phase (Final 30–45 minutes)
What the plumber does:
- Fills new tank completely
- Runs hot water at multiple fixtures
- Checks for leaks or drips
- Tests temperature settings
- Verifies relief valve function
- Documents everything
Your job:
- Confirm hot water is returning
- Check multiple fixtures (kitchen, bathrooms)
- Ask questions about operation/maintenance
- Get documentation of work completed
After Technician Leaves
First 24 hours:
- Let new tank run for 1–2 hours before heavy use
- First shower/bath water may contain air bubbles (normal)
- Check all hot water fixtures
- Verify thermostat setting (should be 120°F)
- Look for any drips or leaks
- Note the installation date for warranty
First week:
- Monitor for any temperature inconsistencies
- Check for leaks daily
- Get familiar with new unit’s operation
- Watch for any unusual sounds
Timeline for Permits and Inspections
If your installation requires a permit (most do), add inspection time:
With Required Inspection
- Installation day: Plumber completes work
- Within 2–3 days: Municipality inspector visits
Inspector Duties
- Verifies proper installation
- Checks permits and licensing
- Tests gas connections (if gas)
- Confirms code compliance
- Issues inspection sign-off
Typical inspection duration: 30–60 minutes
Your responsibility: Be present or authorize someone to be present for inspection.
How to Prepare Your Home for Installation Day
Clear the Work Area
The plumber needs:
- 3–4 foot radius around water heater (all directions)
- Clear path from water heater to exit
- No boxes, tools, or items nearby
- Pet containment away from area
Protect Your Home
The plumber should:
- Lay protective coverings on floor
- Use drip pans under connections
- Protect walls/baseboards if needed
You might want:
- Have old towels available (sometimes dirty work)
- Keep shoes at the door
- Have trash bags ready for old parts
Provide Access
Ensure access to:
- Main water shutoff valve
- Gas shutoff valve (if applicable)
- Electrical panel (for some installations)
- Multiple hot water fixtures (for testing)
- Outdoor area for venting exits (if applicable)
Questions to Ask Your Plumber Before Installation
Make sure you understand the timeline:
- “How long should this installation take?”
- Get a specific time range
- Ask about potential delays
- “What complications might extend the timeline?”
- Understand potential issues
- Know when they’d call to discuss
- “Will I need a second visit?”
- Understand if inspection/follow-up needed
- Plan accordingly
- “When will I have hot water?”
- Understand expected restoration time
- Plan showering/washing around timeline
- “Do you need me present the whole time?”
- Some work can proceed without you
- Know when to be available
- “What should I avoid during installation?”
- Understand restrictions
- Protect your plumbing
- “What’s included in the labor?”
- Old tank disposal
- Permit fees
- Inspection coordination
- Cleanup
Quick Comparison: Installation Time by Type
| System Type | Time | Days Needed | Complexity |
|---|---|---|---|
| Gas Tank | 2–4 hrs | 1 day | Low |
| Electric Tank | 2–3 hrs | 1 day | Low |
| Gas Tankless | 6–8 hrs | 2 days | High |
| Electric Tankless | 8–12 hrs | 2 days | Very High |
| With Electrical Upgrade | 8–14 hrs | 2–3 days | Complex |
The Bottom Line: Time to Replace Your Water Heater
Simple answer: Most water heater replacements take 2–4 hours for tank systems or 6–12 hours for tankless systems.
Realistic Expectations
- ✅ Standard tank replacement: Plan for 3–4 hours
- ✅ Tankless installation: Plan for 2 days
- ✅ With complications: Add 1–3 hours minimum
- ✅ With electrical/gas upgrades: Add 2–6 hours
Key Factors
- Your current system type
- New system type (same or different)
- Any code upgrades required
- Complications during removal
- Permits and inspections
Now that you understand the timeline, are you ready to move forward? Get your free water heater replacement estimate from a licensed plumber, we’ll be transparent about time, cost, and process.
Schedule Your Water Heater Installation Today
At Doctor Water Heater, we respect your time. We provide accurate time estimates upfront, complete most installations in a single day, and keep you informed throughout the process.
Why Choose Doctor Water Heater for Your Installation?
- ✅ Accurate time estimates
- ✅ Licensed, experienced technicians
- ✅ Permit handling included
- ✅ 5-year labor warranty
- ✅ Same-day hot water in most cases
- ✅ Available 24/7 for emergencies
- ✅ Transparent, no surprises
Last Updated: January 2026
Installation times are estimates based on standard conditions. Actual times vary by location, system complexity, and local code requirements. Always discuss timeline expectations with your licensed plumber before installation day.